On our distance education academic support page, you can find various tips to make the courses you teach through distance education more effective, educational materials that can help you create course content, and recordings of the seminars and webinars held within the scope of distance education.
LEARNING MANAGEMENT SYSTEM (LMS) GENERAL USER GUIDE
You can access the video explaining the general use of the HKU Learning Management System (LMS), presented at the meeting held on October 4, 2020, at the link below.
LMS ASSIGNMENT-EXAM MODULE INTRODUCTORY SEMINAR
LMS ASSIGNMENT-EXAM MODULE USER GUIDE
You can access all information regarding assignment and exam operations in the HKU LMS at the link below. In case of a technical problem, you can reach a solution promptly by contacting the technical staff responsible for your Faculty/Institute/School.
Learning Management System Assignment & Exam Module User Guide
Alternative Methods That Can Be Used When Classes Cannot Be Held Through the LMS
1- You can teach your live class via Google Meet or Zoom. It is recommended that you use your HKU email address with Google Meet. In this case, you will have no time limit, and you can also record your meeting. With Zoom, you can teach using any email address you wish. However, classes taught with Zoom are limited to 40 minutes. After 40 minutes, you can start a new session on Zoom and resume the class by sending the meeting participation details to the students again. Both platforms are limited to 100 participants.


Teaching Live Classes with Google Meet and Zoom
*Starting a meeting and recording with Google Meet You can access the training video at https://youtu.be/jErMhGXNVmg.
*Starting a meeting and recording with Zoom You can access the training video at https://youtu.be/6rwx6MEzdhM.
Important NOTE: To share the video recording of a class you taught via Google Meet or Zoom with your students, you can upload the recording to a Google Drive folder. When using Google Drive, it is recommended that you use your email address with the HKU domain. In this case, your Google Drive storage will be unlimited. After uploading your video to your Google Drive folder, you should share the link of the folder with your students.
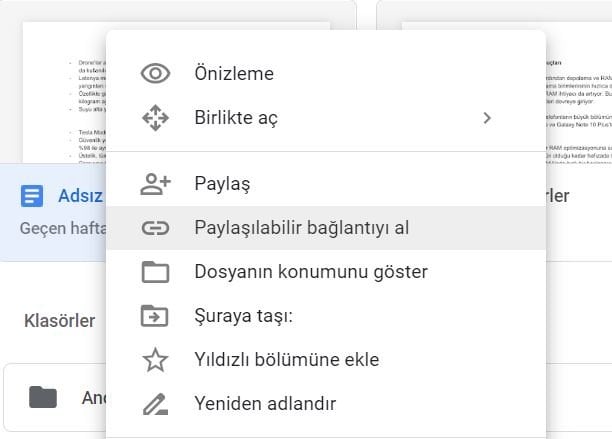
If you taught your class via Google Meet, your video is automatically saved to your Google Drive. In this case, you can simply share the relevant link with your students without needing to upload anything.
Using the Google Classroom Virtual Classroom Platform

2- You can create a virtual classroom with your students via Google Classroom. Google Classroom is a free virtual classroom platform where you can create classes with your students. In Google Classroom, you can invite your students to your virtual classroom. You can hold live classes directly through the Google Meet link in your virtual classroom. You can share course materials with your students. You can make announcements. Through your class Drive folder, you can share in-class resources and collect your students’ materials.
For detailed information:
How to create a class with Google Classroom?
How to invite students to Google Classroom?
How to assign homework with Google Classroom?
Zoom Platform Permission Settings
How Can I Allow Students to Join the Class Automatically on the Zoom Video Conferencing Platform? (Joining the live class without approval)
- Go to https://zoom.us/ in your web browser.
- Click Sign in and then, via Sign in with Google, log in to Zoom with your HKU email address.
- In Settings, under the Security section, disable the Waiting Room feature.
NOTE: During a live class, you can also cancel this feature instantly by clicking the … button in the Participant section and removing the check mark next to Enable Waiting Room, as shown in the image below.

How Can I Prevent Students from Interfering with the Screen, such as Scribbling, While Sharing My Screen on the Zoom Video Conferencing Platform?
- Go to https://zoom.us/ in your web browser.
- Click Sign in and then, via Sign in with Google, log in to Zoom with your HKU email address.
- In Settings, under the In Meeting Basic section, disable the Annotation feature.
NOTE: If you want to cancel this feature instantly while sharing your screen during a live class, after you share your screen, click the More … button in the menu on the control panel that appears and disable it with the Disable participants annotation option, as shown in the image below.
While teaching a live class with Zoom, we can divide students into groups during the lecture and carry out collaborative work. Or we can organize an online workshop and, at some stage of the workshop while the session continues, divide the participants into small groups so that they work among themselves simultaneously. To do this, we must use Zoom’s Breakout Room feature. How to use this feature is described step by step below:
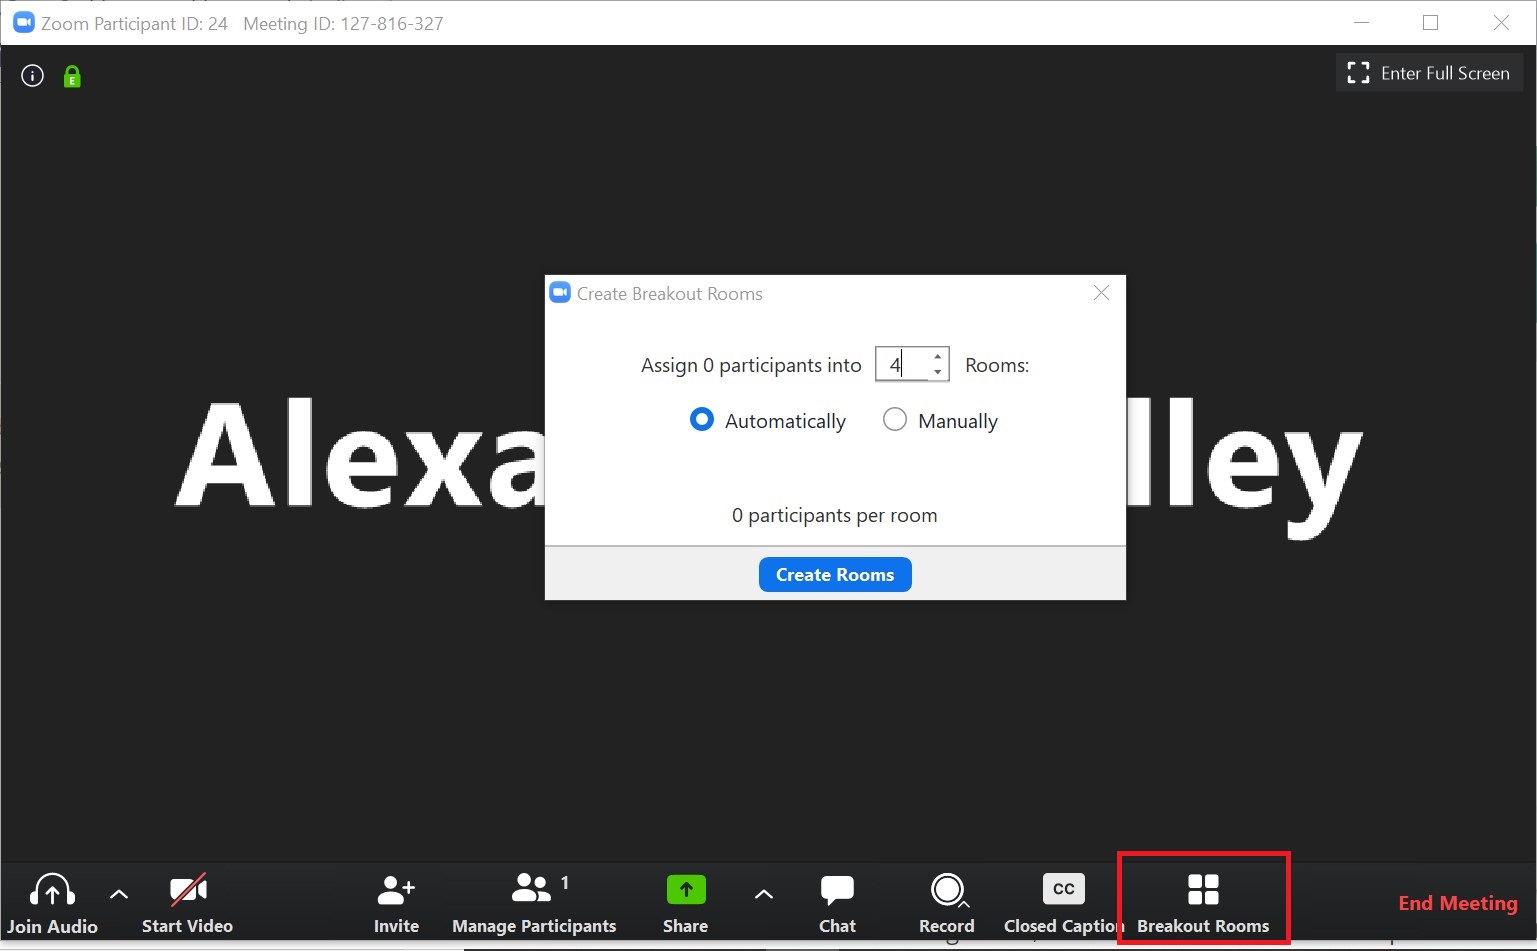
Step 1: You have delivered your lecture. At the stage of your class where you will do group work, click the Breakout Rooms button on the Zoom control panel. On the screen that appears, enter the number of groups you want to divide your participants into. If you want your participants to join the group they prefer, select the Automatically option. If you want to place your participants into groups yourself by name, select the Manually option.
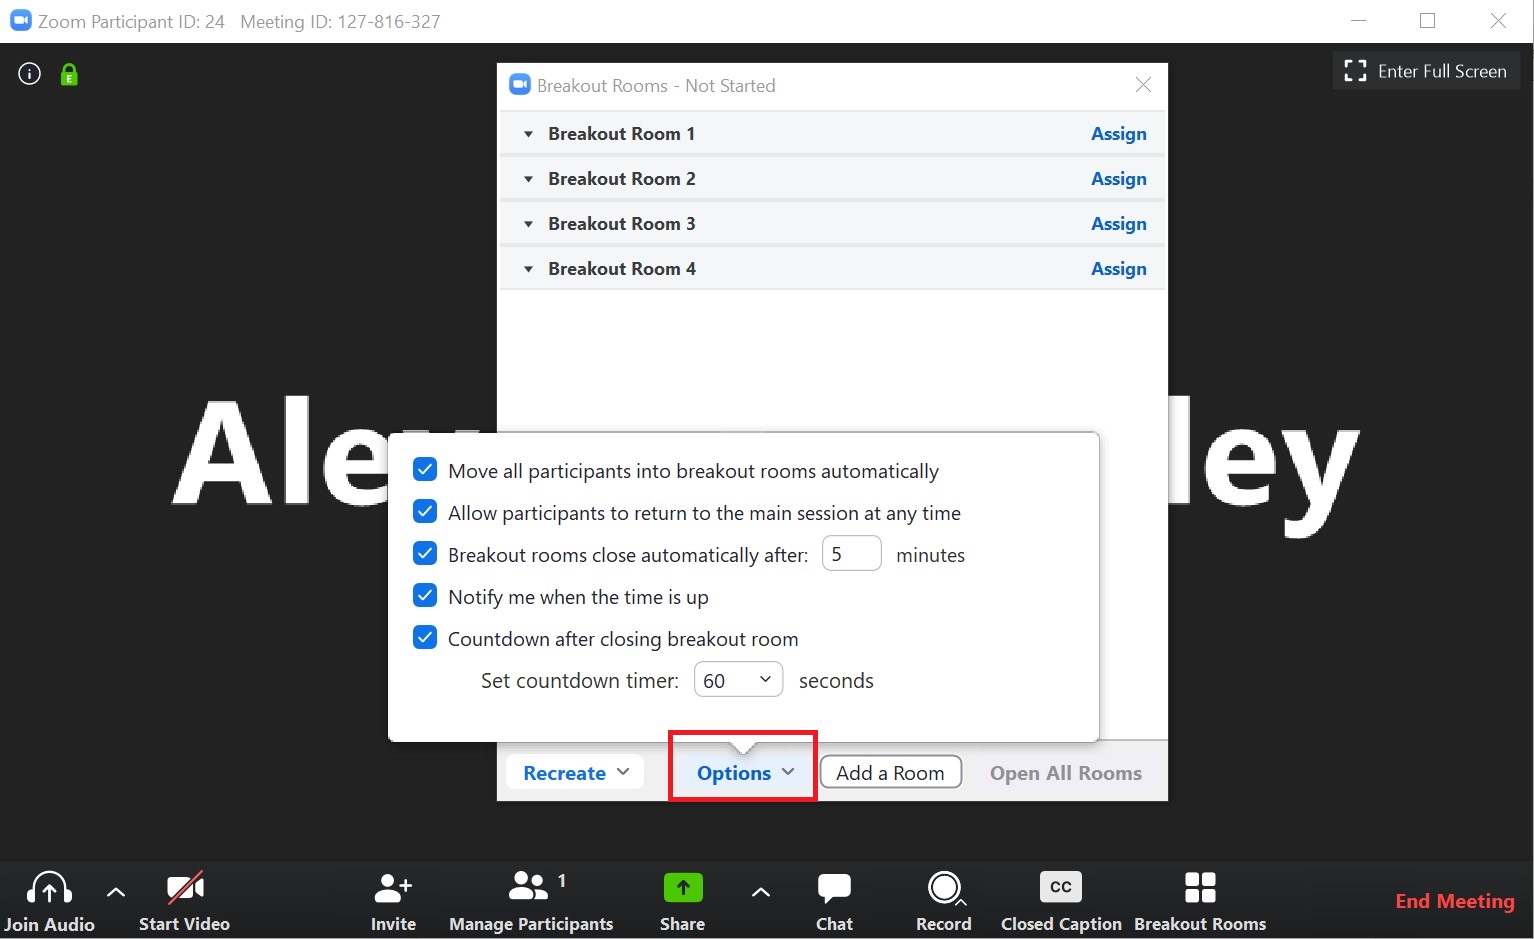
Step 2. Suppose you wanted to create 4 groups and chose the automatically option (participants can join the group they wish of their own accord). You can change the group names using the pencil icon that appears when you click on them. If you want to assign your participants to groups manually, you should click the Assign option on the screen that appears. On the same screen, from the Options menu, you can configure settings such as whether participants will join the rooms automatically, whether participants can return to the main session whenever they wish, and when the rooms will be closed automatically.
Step 3. Direct your students/participants to click the Breakout Rooms button on their own control panels and enter whichever of the groups you created they wish.
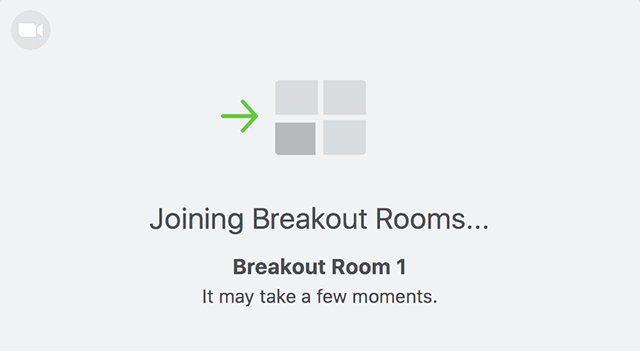
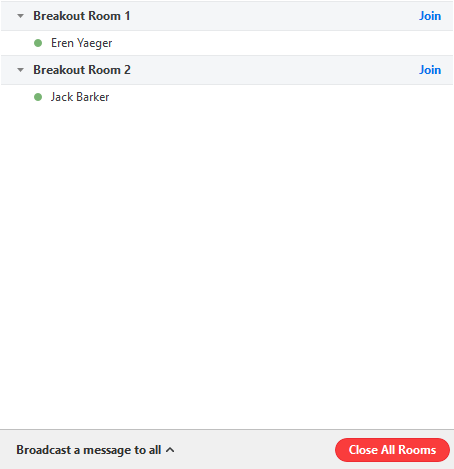
Step 4. While your students/participants are working in groups, you can click the Breakout Rooms button on the same panel and join any group you wish by clicking “Join”. You can also click the Close All rooms option at any time to close all sessions and return the participants to the main session.
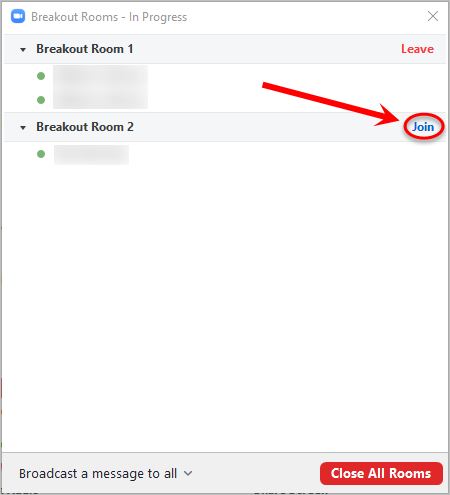
Important NOTE 1: For this feature to be active, the latest version of the Zoom application must be used. If this feature is not available on your control panel or on the participants’ Zoom control panels, please download the latest version of Zoom from https://support.zoom.us/hc/en-us/articles/201362233-Upgrade-update-to-the-latest-version and update Zoom. Or guide your participants on this matter.
Important NOTE 2: Zoom’s Breakout Rooms feature is activated automatically in classes held through our LMS. If you want to use this Zoom feature in video conferences you hold with your personal email account, you must first activate it. To do so, sign in by clicking Sign In on the main Zoom website https://zoom.us/. Click settings on the left, and in the In Meeting Advanced area you can enable this feature.

ORGANIZING NON-CLASS ACTIVITIES (SEMINARS, MEETINGS, MAKE-UP CLASSES, ETC.) VIA ZOOM VIDEO CONFERENCING THROUGH THE LMS
Meetings and other activities we hold on Zoom video conferencing with our personal account are limited to 40 minutes. For this reason, it may not be practical for us. For activities such as make-up classes, meetings, and seminars, you can use the Meetings feature at https://lms.hku.edu.tr/login. In the events we create here, the Zoom video conferencing platform is used, just as in our other classes. In addition, the maximum number of participants is 300. To create an event with the meeting feature through the LMS, you should follow the steps in the document below.
Holding Video Conferences via Zoom Through the LMS (for Make-Up Classes, Meetings, Workshops, etc.)
AN ALTERNATIVE TOOL TO THE LMS EXAM MODULE: CREATING A QUIZ WITH GOOGLE FORMS

As a precaution against possible problems in the LMS, you can also create the questions you have prepared as a quiz using Google Forms and share it with your students via Google Classroom.
In this article, we will learn the following:
1- How do we create a quiz with Google Forms?
2- How can we share a quiz created with Google Forms with our students via Google Classroom?
1- How do we create a quiz with Google Forms?
Step 1. Google Forms, click the Plus icon 
Step 2. Click the Settings icon at the top right 
Step 3. Click Quizzes 
Optional: To collect email addresses, click General
Step 4. Click Save.
Creating an answer key, scoring, and adding automatic feedback
You can create an answer key for certain question types:
- Short answer
- Multiple choice
- Checkboxes
- Drop-down
- Multiple-choice grid
- Checkbox grid
Creating an answer key
- To add a question, click Add question
.
- Fill in your question and answers.
- At the bottom left of the question, click the Answer key option.
- Select the correct answer or answers.
- At the top right of the question, select how many points the question is worth.
- If you want to add a written or YouTube video explanation to the answer, click Add answer feedback.
- You can edit the questions or answers by clicking on them.
Note: You can score all question types and add feedback.
You can determine whether users can see the questions they left unanswered or answered incorrectly, the correct answers, and the point values.
- Google Forms, open a quiz.
- Click the Settings icon at the top right
- Quizzes.
- Under “Respondents can see,” check the boxes next to the options you want. (If you do not want students to see the correct answers at the end of the exam, you can adjust this in this section. Also from this section, you can determine whether they will see the point values of the questions and the questions answered incorrectly.)
Scoring responses
If you are collecting email addresses, you can score responses individually and add feedback. After grading a response, save the changes you made.
- Google Forms, open a quiz.
- Click Responses at the top.
- Individual.
- People To navigate between people, click Previous
or Next
.
- Find the question you want to grade.
- At the top right, enter the points the response received.
- Below the answer, click Add feedback .
- Enter your feedback and click Save.
- To save the changes you made, click Save at the bottom.
- Forms, open a quiz.
- At the top, click More
Preferences.
- If you want to set the same point value for all questions in the quiz, check the Default question point value box, enter a value, and click Save.
- If you want to change the point value of questions individually:
- On the question, click Answer key.
- Enter the value and click Done.
- Google Forms, open a quiz.
- Click Responses at the top.
- Summary.
Sharing results
If you are collecting email addresses in your form, you can send the results immediately or wait until you are ready to share them. By default:
- Grades are released immediately.
- Email addresses are not collected.
Changing how you release grades
- Click the Settings icon at the top right
- Quizzes.
- Then, select the option Later, after manual review .
- Save.
Source: https://support.google.com/docs?hl=tr&ref_topic=6063584
2- How can we share a quiz created with Google Forms with our students via Google Classroom?
Thanks to Google Classroom’s Quiz assignment feature, you can send the quiz you prepared with Google Forms to students and carry out assessment. You can assign the quiz assignment to one or more classes or to individual students, schedule it to be posted later, add a due date and time, and attach files. Google Forms can grade the quiz automatically, and you can export the grades to Classroom. Students can see their grades immediately or after you have reviewed their responses.
Step 1. Create a Quiz assignment
-
classroom.google.com – open this page.
- Click the relevant class
- At the top, click Create
- Enter the title and, if any, the instructions.
Step 2. Set up your quiz in Google Forms
When you create a quiz assignment, Google Classroom uses Google Forms to create a blank quiz and attaches this form to the assignment. If you wish, you can open this blank quiz and create your own quiz with Google Forms by following the instructions above. If you already have a Google Forms quiz that you prepared earlier, you can delete the blank form with the X option and add the Google Forms quiz saved in your Google Drive using the Add option. Alternatively, you can add the link to the Google Forms quiz. After setting up your own quiz with one of these methods, you can allow students to see their grades immediately after submitting their responses. If you change the name of the quiz in Google Drive, the quiz name is also updated in Classroom.
Exporting quiz grades from Forms to Classroom
To import grades:
- The quiz must be the only attachment in the assignment.
- Students are limited to one response and must be in the same domain as the teacher.
- The form must collect student email addresses.
You cannot import grades if you change any of these settings after saving or posting the assignment, or if you edit the assignment.
Note: If you add a form as a link in Classroom, you cannot import student grades.
Source: https://support.google.com/edu/classroom/answer/9095575?hl=tr
ANOTHER ALTERNATIVE TOOL THAT CAN BE USED IN EXAMS: SOCRATIVE


Socrative is an alternative Web 2.0 tool that you can use to prepare an online exam. In quizzes that can be administered simultaneously in or outside the classroom, you can prepare multiple-choice, true-false, and short-answer questions. When creating a quiz, it offers options such as allowing/not allowing students to go back to questions, setting a time limit per question, giving/not giving instant feedback, and shuffling/not shuffling questions.
Creating a quiz with Socrative step by step
Step 1. www.socrative.com When you go to the address, click the “Teacher Login” tab, and you can register either with your email address or with your Google account.

Step 2. After logging in, on the page that opens with the MANAGE QUIZZES button, we can start creating a quiz by clicking the CREATE QUIZ button.

Step 3. A screen like the one below will appear. At this stage, we must give our quiz a name. In addition, we can optionally add multiple-choice, true-false, or short-answer questions to our quiz.

Step 4. While creating the questions, we must also enter the answers and mark the correct option.

After preparing our exam, we save it by clicking the “SAVE&EXIT” tab in the upper right corner. We can see this exam later by clicking the “My Quizzes” tab.
Sharing an Exam Created with Socrative with Students
Students can join the activity by going to www.socrative.com on their computers and choosing “Student Login,” or by downloading the “Socrative Student” app on iOS- and Android-based phones or tablets.
In the Student Login section, students will be asked to enter a room number. Give the students the Room number at the top of your main page.
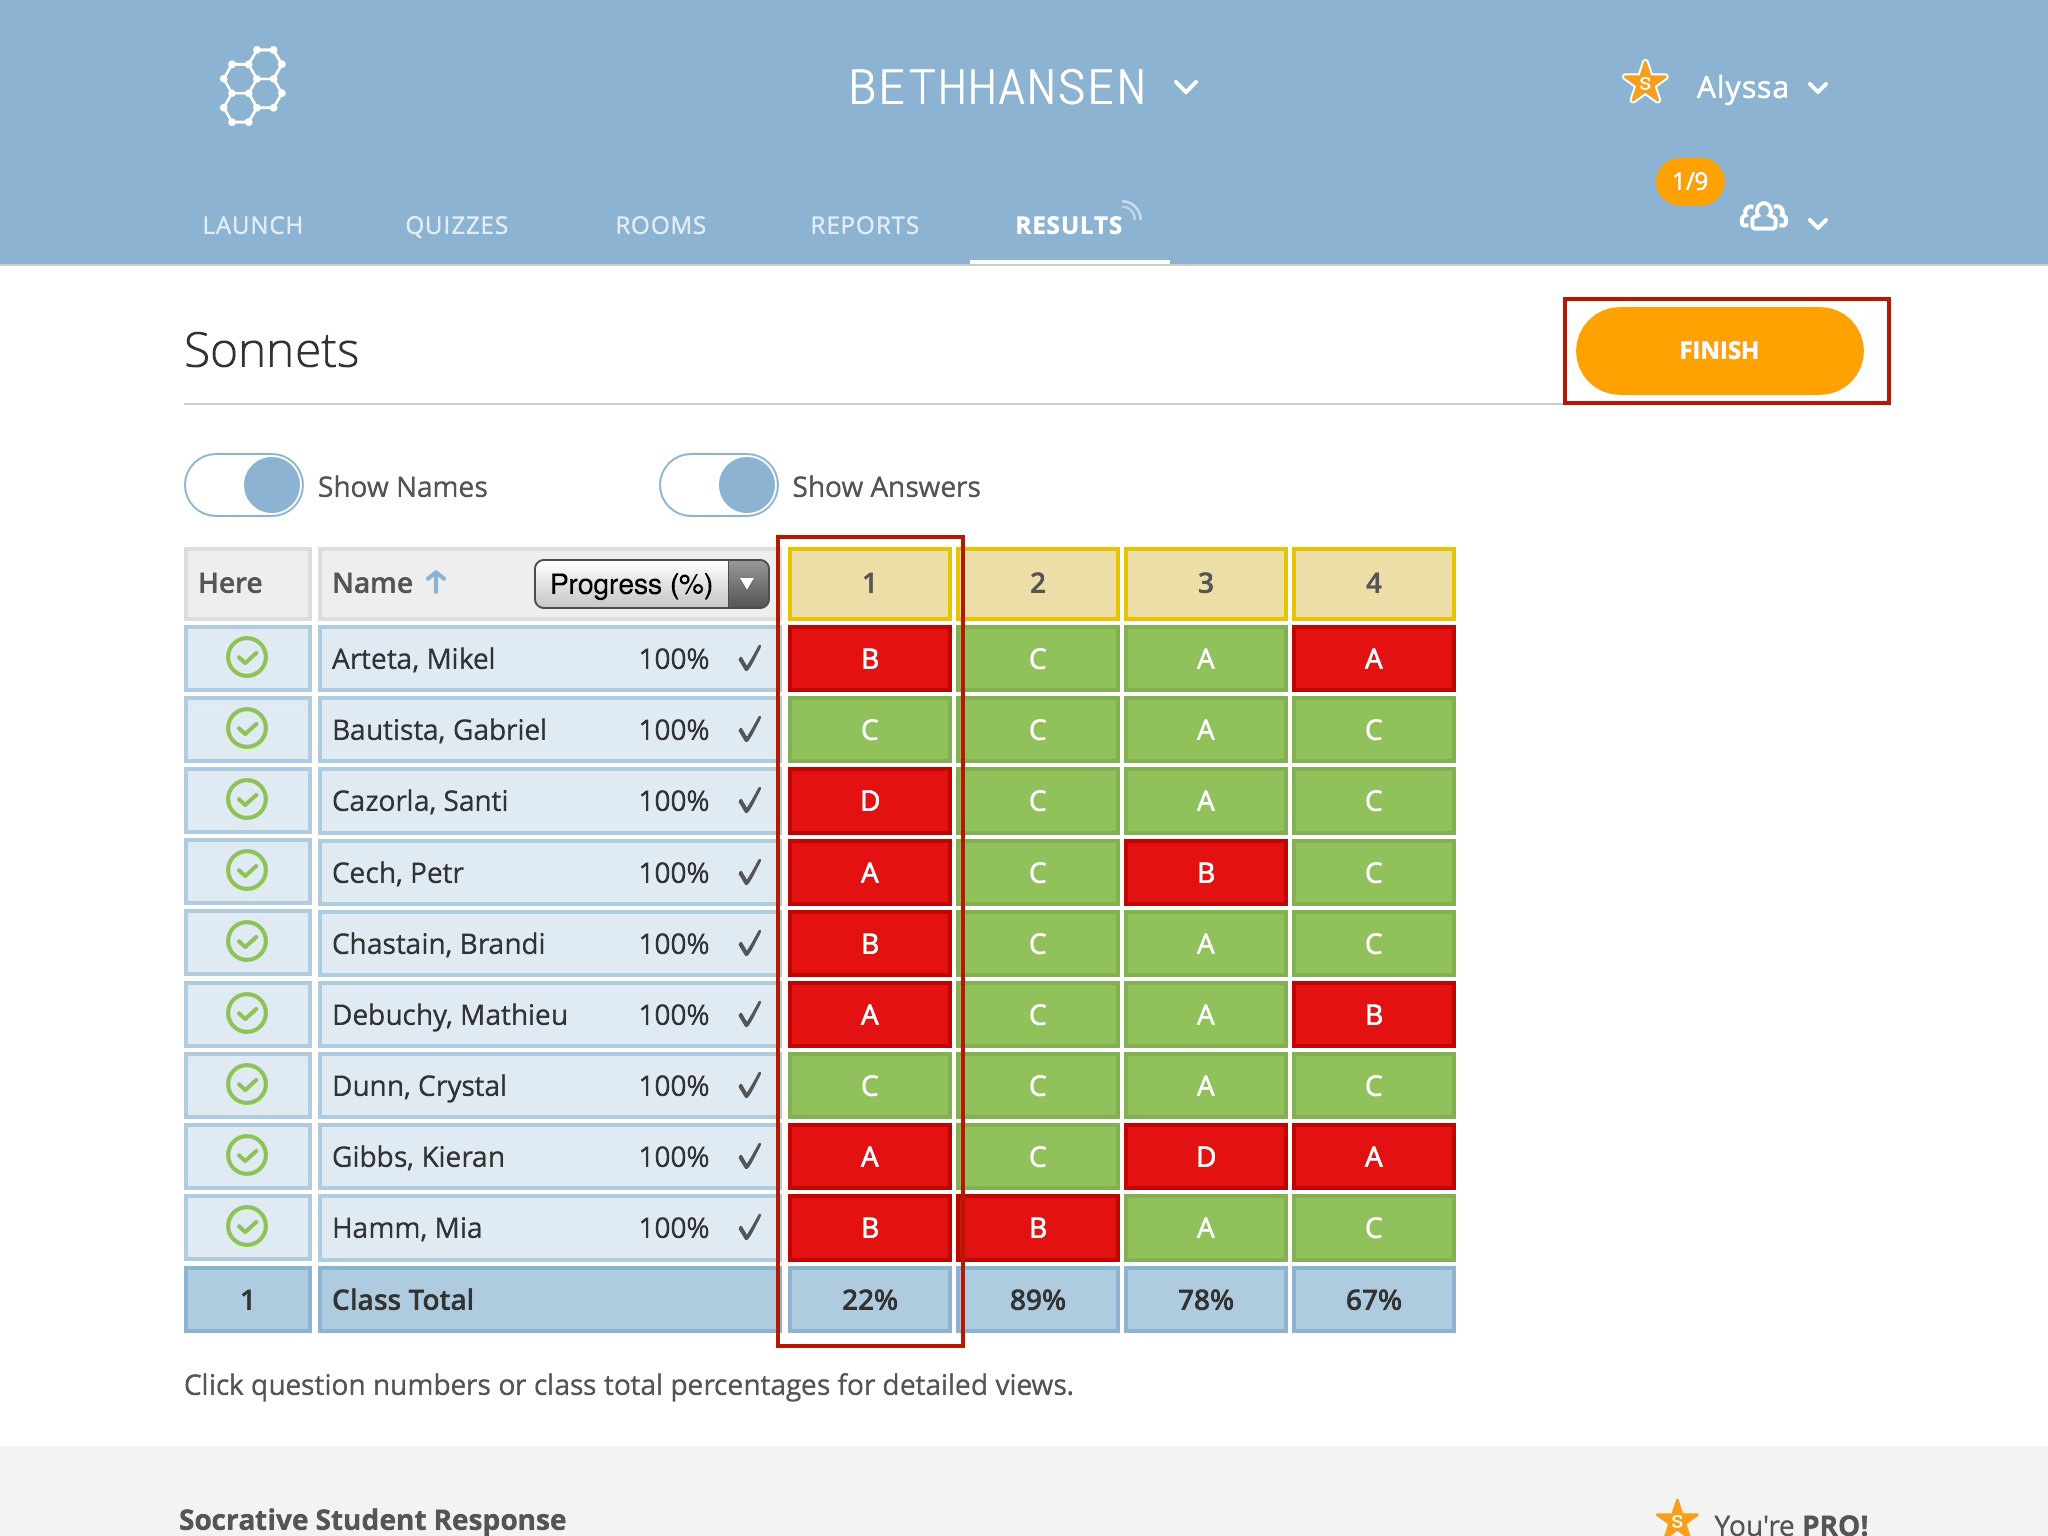
After students enter the room number, they are asked to enter their name on their screen. After the student enters their name, the exam begins, and you can see on your screen what all the students are doing in real time.
Administering an Exam Created with Socrative
To do this,
- We click the “Start a Quiz” tab on our main page.
- We click the exam we want.
- We can optionally set options such as: Should the questions be shuffled? Should students see whether their answers are correct or incorrect after answering? Time limit settings per question. When we click “Start,” the exam begins.

OTHER EDUCATIONAL TECHNOLOGY TOOLS THAT CAN BE USED IN ASSESSMENT AND EVALUATION
In distance education, process evaluation and outcome evaluation methods can be used for assessment and evaluation. There are online exam creation tools for outcome evaluation, and tools for assignments, quiz creation, e-portfolio preparation, and fostering in-class interaction for process evaluation. Below are the educational technology tools that can be used for process and outcome evaluation.
Viewing the Recordings of Unmerged Classes by Students

In unmerged classes, instructors start the live class from one group and send the live class link to the other groups so that all students can attend. However, because the class is not merged, students who join the class via the link cannot watch the class recording through the LMS. As a solution to this problem, the link to the class video recording can be copied from the LMS and shared directly with the students.
This can be done by following the steps in our article below.
https://rc.hku.edu.tr/uzom/birlestirilmeyen-derslerin-kaydinin-tum-ogrenciler-tarafindan-izlenmesi/
Online Assessment and Evaluation Seminars
You can watch the recording of the online seminar on “Online Measurement Tools” held by Asst. Prof. Dr. Ufuk AKBAŞ, moderated by Prof. Dr. Şener BÜYÜKÖZTÜRK, on 09.12.2020, in the video below.
An online seminar on “E-Portfolio in Distance Education Assessment and Evaluation” was held by Prof. Dr. İsmail Karakaya on 07.12.2020, moderated by Prof. Dr. Şener BÜYÜKÖZTÜRK. You can watch the recording of the seminar in the video below.
An online seminar on “Test Development in Distance Education Assessment and Evaluation” was held by Asst. Prof. Dr. Ömer KUTLU on 12.12.2020, moderated by Prof. Dr. Şener BÜYÜKÖZTÜRK. You can watch the recording of the seminar in the video below.
ARTIFICIAL INTELLIGENCE AND EDUCATION APPLICATIONS WEBINARS
On December 2, 2020, the “Artificial Intelligence and Education Applications” webinars were organized by the Faculty of Education of Hasan Kalyoncu University.
The webinar was held under the moderation of Prof. Dr. Veysi İşler, Faculty Member of the Department of Computer Engineering at the HKU Faculty of Engineering, and Prof. Dr. Mehmet Tekerek, Head of the Department of Computer and Instructional Technologies Education (CEIT) at Kahramanmaraş Sütçü İmam University (KSU).
In the first part of the webinar, Assoc. Prof. Dr. Sinan Kalkan, Faculty Member of the Department of Computer Engineering at METU, made important remarks on “Artificial Intelligence and Its Basic Concepts, Areas of Use of Artificial Intelligence”; Assoc. Prof. Dr. Burak Şişman, Faculty Member of the CEIT Department at İstanbul Cerrahpaşa University, on “Example Artificial Intelligence Applications in the World and in Turkey”; and Asst. Prof. Dr. Ferhat Kadir Pala, Head of the CEIT Department at Aksaray University, on “The Place and Importance of Artificial Intelligence in the Education System.” In the second part of the webinar, which continued in a question-and-answer format, Asst. Prof. Dr. Özge KELLECİ, Faculty Member of the HKU Faculty of Education, presented “Artificial Intelligence Applications in Teacher Training,” and Gökhan Yücel from the Communications Directorate of the Presidency of the Republic of Türkiye presented “Artificial Intelligence Applications/Projects/Trainings in Education,” offering alternative perspectives to the webinar. You can watch the recordings of the webinars in the video below.
WEBINAR ON TYPES OF INTERACTION IN DISTANCE EDUCATION
The aim of this event held on April 7, 2021, with Asst. Prof. Dr. Özge KELLECİ as moderator and Prof. Dr. Arif Altun as speaker, is to present information and recommendations on how interaction among instructors, content, the educational institution, and learners, and active learning in the instructional process, can be ensured for effective distance and blended instruction. You can watch the recording of the webinar in the video below:
WEBINAR ON THE DIGITALIZATION PROCESS IN EDUCATION AND MATERIAL DEVELOPMENT
The aim of this event held on March 31, 2021, with Asst. Prof. Dr. Özge KELLECİ as moderator and Prof. Dr. Sadi Seferoğlu as speaker, is to raise awareness of the importance of digital transformation in education for distance and blended instruction, to present information on material development in education for an effective blended/distance instructional process, and to offer recommendations on which instructional technologies educators can benefit from. You can watch the recording of the webinar in the video below: